Introduction
The Experiment designer is the tool used during data rodeos to configure an IPI, resulting in a runner.
Sections
Following, each section of the tool is described:
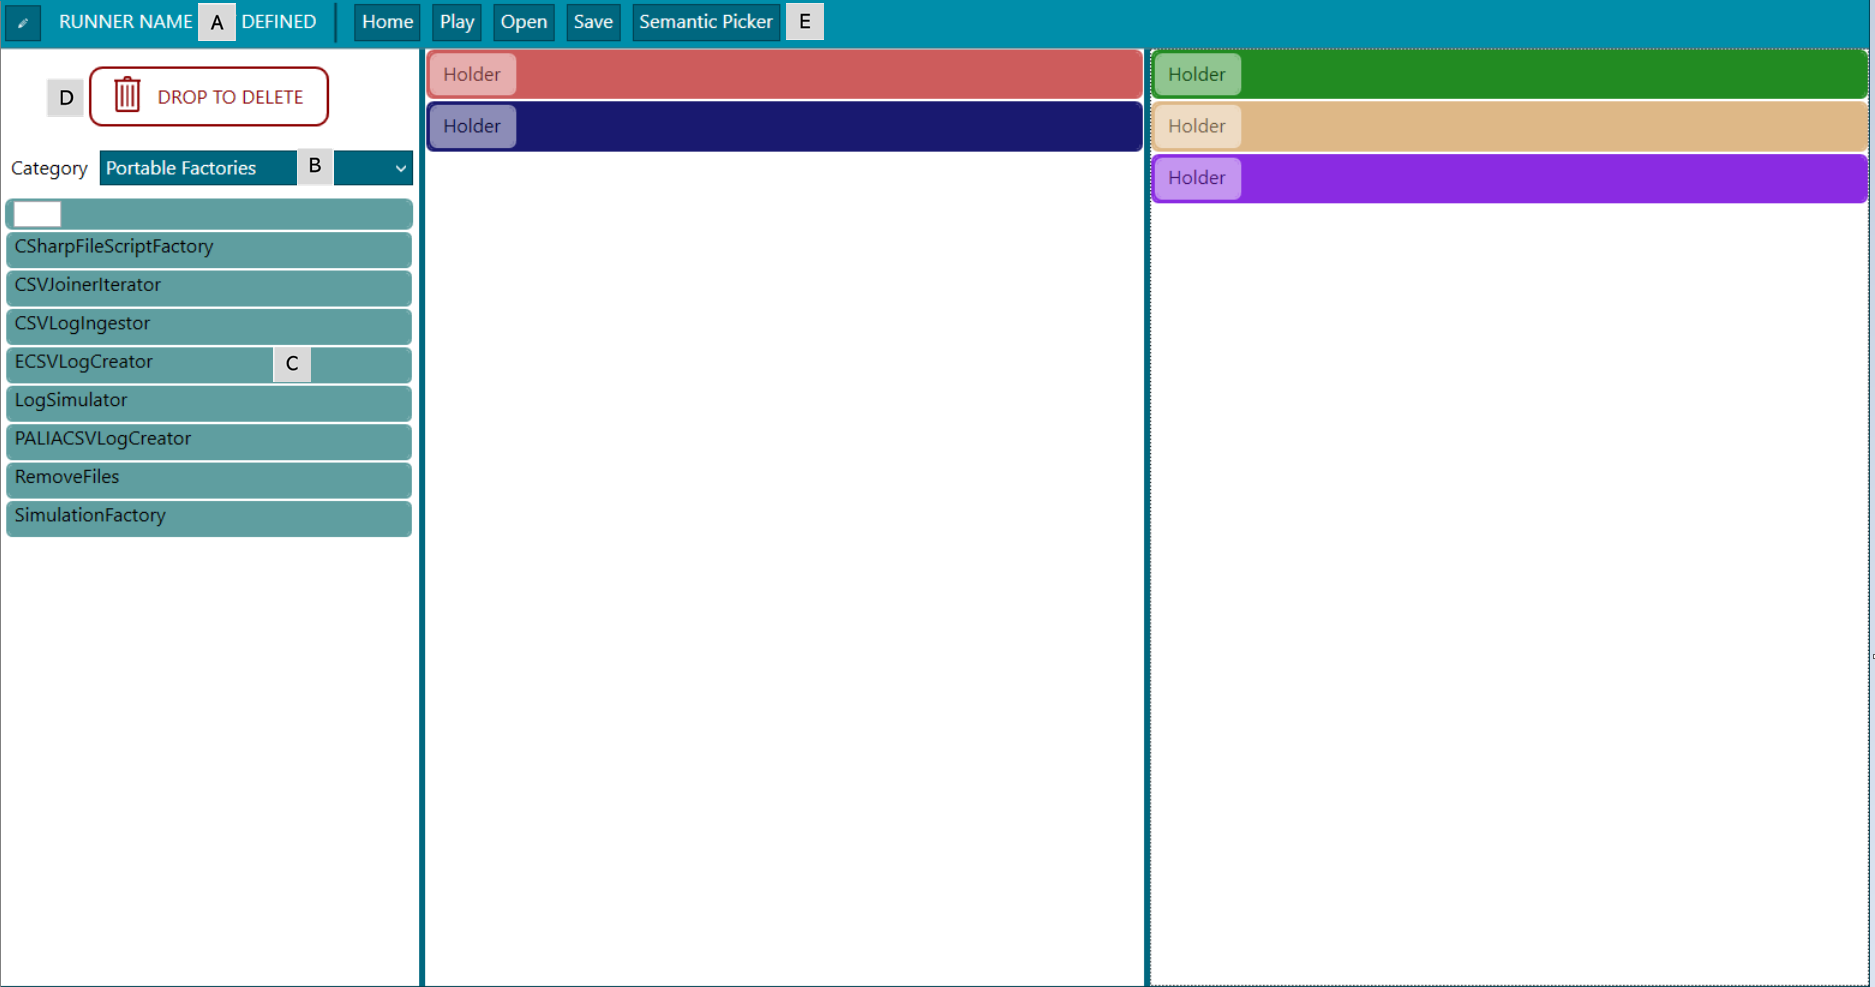
 Figure 2. Experiment designer - sections
A) Experiment name. It is possible to assign a name and a description to the experiment in order to have clues of what instructions of the health professional have been included in the configuration so far.
B) Categories. The drop down contains five options, one per phase of the data rodeo process. Every option lists the blocks corresponding to a specific phase that is executed in order.
C) Blocks. Available blocks are placed here, to know more about each one go here. Those can be only placed in those areas of the corresponding datarodeo phase. IPMT is also prepared to add new ones if needed as it is explained in the create a block section. For creating new blocks from scratch it is necessary to start the instructions in here.
D) Delete blocks. To delete a block just drag and drop it over the button DROP TO DELETE.
E) Menu options
-
Home, goes back to the HOME menu
-
Play, executes a runner
-
Open, opens an existing runner file
-
Save, saves the changes in a runner file
-
Semantic Picker, opens a new windows with the semantic concepts available after executing the experiment
Phases
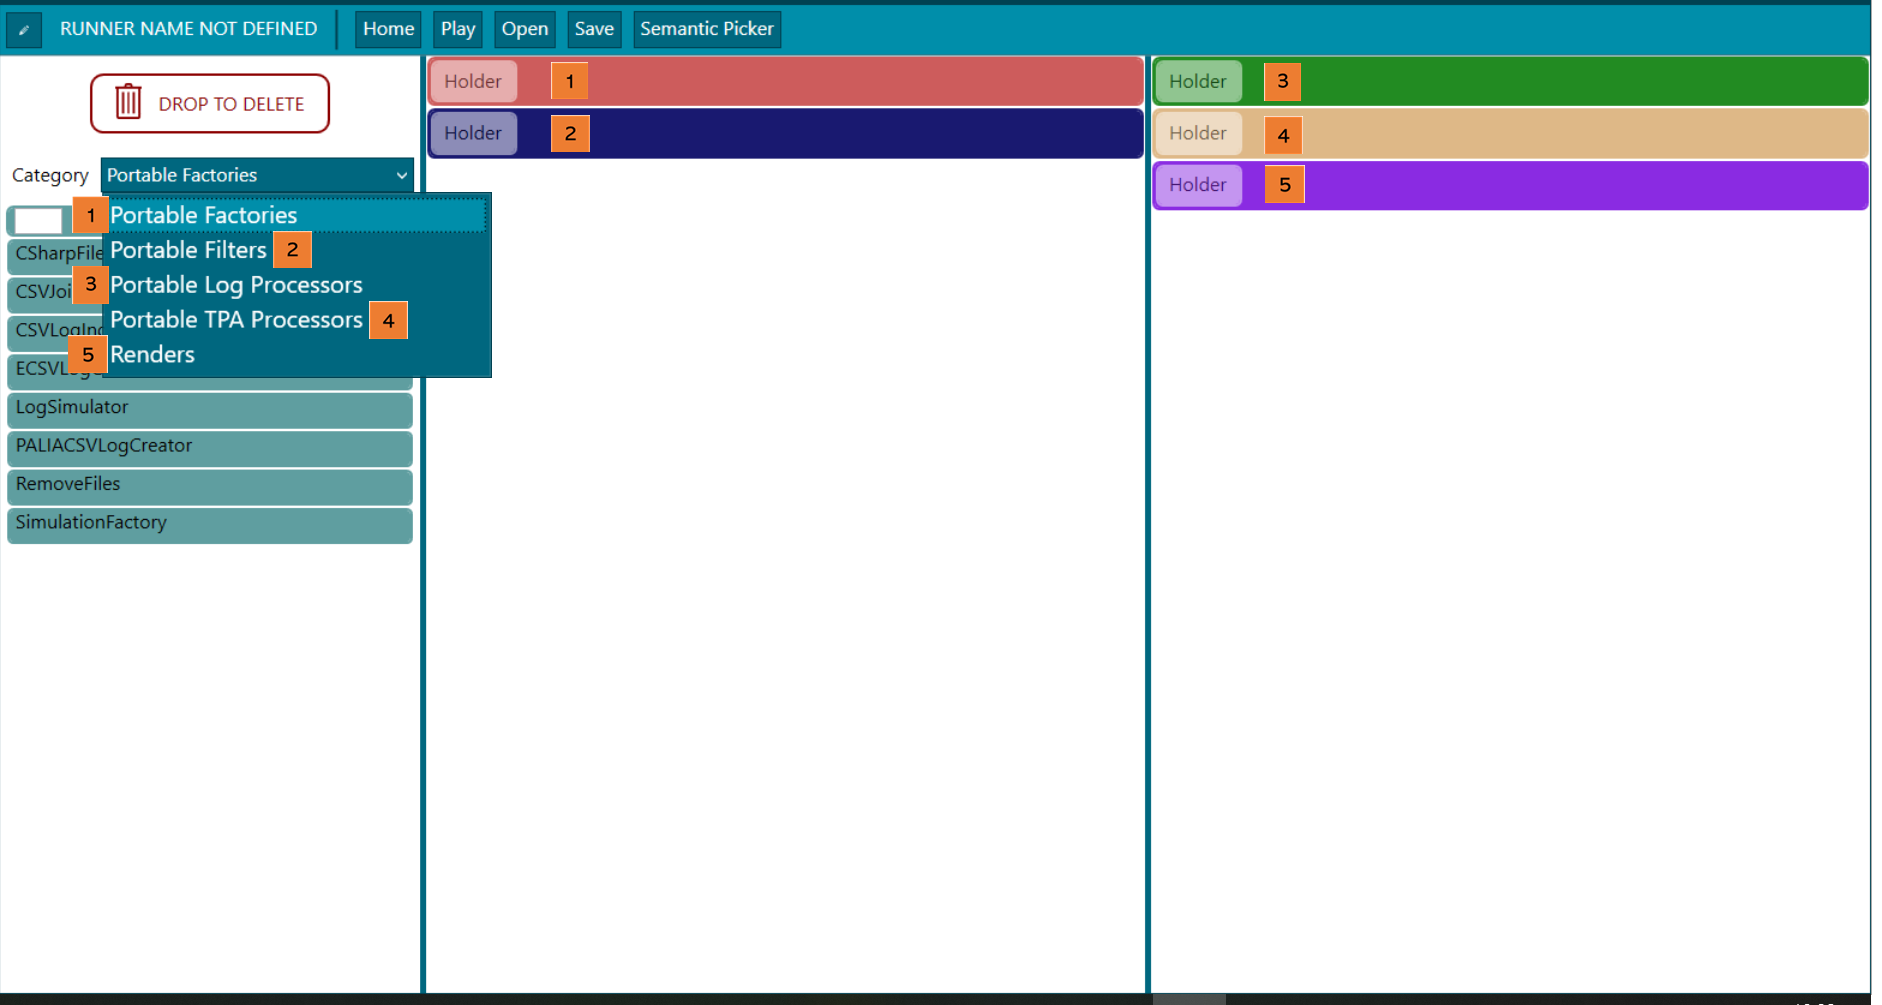
As is explained in this section data rodeo phases are executed sequentialy in the order that appear.
 Figure 3. Experiment designer - phases
(1) Factory. Input data or input connections are set in this section, admitting different formats (CSV, eCSV, MongoDB, PaliaCSV…), see factory section. Depending on the block it is needed to define an ingestor. The ingestor editor is available from a button right in each corresponding block as in the following picture. In the Factories area (1) a Log can be produced in which case the Filters (2) can be applied inside the ingestor; or can be produced more than one Log, in which case merging the Logs is needed with the MergeLogsFilter block at the Filters phase (2) of the data rodeo process. As it can be seen, in the following picture there are two CSV blocks, which each one generates a Log that later on need to be merged in the block before mentioned. It is clearer explained in the data rodeo execution section.
 Figure 4. Experiment designer - factory blocks
(2) Filters. Filters pre-processes the data before the mining, for example, a filter to erase traces that have NULL values. There are several filters that are very useful at the time of creation of a runner. These are TraceHomogeneizer, that addes @Start and @End nodes to the TPA if needed, Delete not Corforming Traces which deletes all traces that not conform to a TPA given.
(3) Log processors. The way the log will be processed is selected here, i.e. PALIA process discovery in order to create a TPA. Here the discovery algorithm to be used is specified.
(4) TPA processors. Once there is a TPA, it may be processed further, and that processing is set up here. Interesting blocks are Order non-semantic property values and CopyPositionsProcessor for a better understanding.
(5) Rendering. The information shown around the TPA is selected at this step. In this case, SemanticToolTipRenderHandler and StatsInfoLabelTransitionBlock are available.
For further information about available blocks consult Blocks section.